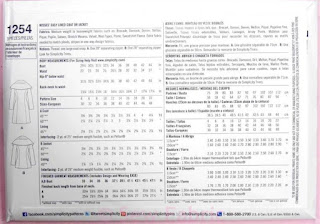
This is my first attempt at making a winter coat. I came across this Simplicity pattern whilst browsing ads on ebay and was drawn to the hood/shawl design so clicked 'buy' and started thinking about fabric...
I found my fabric in Barry's Fabric store in Digbeth. It's mainly grey with threads of blue and green woven through so i decided to buy green anti-static lining to compliment it.
The coat is made up of two front panels and two side front panels. Two side back panels and a back panel. Then you have the sleeves and the hood. Everything but the hood needs to also be cut out of the lining. My wool coat fabric was 150cm wide and i bought 4 metres which is more than enough.
The front edge of the front two panels are folded over where the pattern indicates and the zip is attached face down, it will be concealed by the folded edges when the coat is zipped up.
This pic is upside down and i can't figure out how to flip it.... The pockets are half wool and half lining. I initially put them on back to front and had to do a lot of unpicking!! You need the lining half to be attached to the front panel and the wool part to the side front panel. That way if the pocket gapes open you'll only see the wool fabric and the pockets will remain pretty invisible in the princess seam line.
Here's the pocket, wrong way around but right way up, sewed into the seam... I have also ironed on fusible interfacing to the back of the wool for a bit of insulation.
From the outside the pocket is hardly noticeable.
I then sewed up the three back panels and sewed up the side seams.
I read quite a few reviews on this pattern that said the hips come out really wide. I found exactly the same thing so at this stage i started to take a few of the seams in then once i was happy i overlocked it all up. I love the inside of an overlocked garment :D
Next job was to attach the sleeves. As other's have found, the sleeves come out a little short. I wish i'd measured up beforehand because i had to scrap my first set of sleeves and cut a longer set.
Before attaching the wool and the lining together i spent some time pressing all the seams as flat as i could.
To be continued.....


No comments:
Post a Comment