Sunday, 25 October 2015

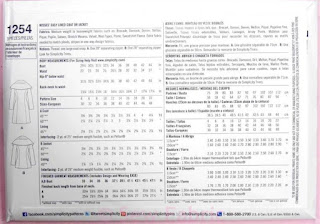
simplicity 1254 Leanne Marshall coat: Part Two

The next part of the construction was to attach the lining and outer coat together. With the fabric right sides together I first sewed the side seams together. I then followed the confusing instructions on how to incorporate the lining into the corners of the coat whilst leaving a border of coat fabric around it...


Here's some close up shots of this bit, the instructions on the pattern were pretty useless so anyone wanting to make this coat might find colour photos useful!


Looks great when you flip it back around the right way!


The zip is the easiest bit, its just plonked on top so i bought one with nice metal teeth.


Next you turn the coat inside out again to sew up the bottom seam a couple of cms up from the bottom. You also want to leave the lining a bit longer than your coat to allow for movement. The last thing you want is for all your seams to pop open the first time you bend over!


Ta da! Side and bottom seams done :) I attached the bottoms of the sleeves together and then sewed some discrete stitches by hand to anchor the tops of the sleeve lining to the coat so it wasn't all sitting loose.


I decided against doing the caped hood which, ironically, was the feature that drew me to this pattern in the first place. The main reason was the hood wouldn't have been functional at all and i like a hood so i don't have to carry a brolly! Also, i like the ruffles on my sleeve seams and didn't want this detail hid beneath a cape. So, i drew around a hood off another coat and made one from the wool and one from the lining. I made the lining version slightly smaller so that the wool would roll around into the inside and make a border preventing the lining from poking out.


Here's my little border created by cutting the lining a bit smaller. I top stitched all the edges on the coat to make it look a little bit more professional.


I used the machine to attach the wool part of the hood to the coat then sewed the lining up by hand, adding a useful little hook.


And here's the finished product :)


I'm really pleased with the coat. I like it more and more as i wear it. Once i've worn this one out i'm sure i'll make another...


UPDATE: recently added some applique patches which really seem to be catching on lately...


Sunday, 11 October 2015

Simplicity 1254 Leanne Marshall Coat: Part One


This is my first attempt at making a winter coat. I came across this Simplicity pattern whilst browsing ads on ebay and was drawn to the hood/shawl design so clicked 'buy' and started thinking about fabric...


I found my fabric in Barry's Fabric store in Digbeth. It's mainly grey with threads of blue and green woven through so i decided to buy green anti-static lining to compliment it.


The coat is made up of two front panels and two side front panels. Two side back panels and a back panel. Then you have the sleeves and the hood. Everything but the hood needs to also be cut out of the lining. My wool coat fabric was 150cm wide and i bought 4 metres which is more than enough.


The front edge of the front two panels are folded over where the pattern indicates and the zip is attached face down, it will be concealed by the folded edges when the coat is zipped up.


This pic is upside down and i can't figure out how to flip it.... The pockets are half wool and half lining. I initially put them on back to front and had to do a lot of unpicking!! You need the lining half to be attached to the front panel and the wool part to the side front panel. That way if the pocket gapes open you'll only see the wool fabric and the pockets will remain pretty invisible in the princess seam line.


Here's the pocket, wrong way around but right way up, sewed into the seam... I have also ironed on fusible interfacing to the back of the wool for a bit of insulation.


From the outside the pocket is hardly noticeable.


I then sewed up the three back panels and sewed up the side seams.


I read quite a few reviews on this pattern that said the hips come out really wide. I found exactly the same thing so at this stage i started to take a few of the seams in then once i was happy i overlocked it all up. I love the inside of an overlocked garment :D


Next job was to attach the sleeves. As other's have found, the sleeves come out a little short. I wish i'd measured up beforehand because i had to scrap my first set of sleeves and cut a longer set.


 The lining of the coat needs to be sewn up the same size as you did with the fashion fabric, therefore i had to make the same alterations to the lining as i did with the side seams and sleeves.


Before attaching the wool and the lining together i spent some time pressing all the seams as flat as i could.

To be continued.....

Saturday, 25 July 2015

Make your own continuous bias binding

Struggling for ideas of what to do with your leftover bits of fabric? Read on to find out how to make your own bias binding to use on you future projects...

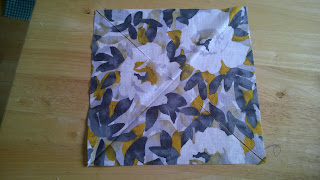
First cut out a square of fabric, makes sure the sides are perfectly equal. Then, fold in half diagonally and cut it into two triangles.


Next, flip one of the triangles around and sew them together


There should be a little overhang of fabric at the edges, this is expected. When you open them out you should have a neat parallelogram. 


On the under side of your fabric draw straight lines in preparation to cut your binding out. I cut my lines about 4 cm apart so my binding will end up approx just over a cm in width when folded for use.


Now for the slightly tricky bit. You want to fold your fabric up to make a tube, however because you are cutting the binding in a continuous strip you need to stagger the top row.


Once you have lined up your pencil markings, sew up your tube


The final thing to do is cut along your lines!


I began with a 22x22cm square and got over a metre of binding :D


Monday, 20 July 2015

Thai holiday Linen trousers

So i needed some light trousers for my first holiday to the far east! For about a second I thought about grabbing some cheapo ones from Primarni then gave myself a slap. I took the basic shape of the trousers from Simplicity K1620 and then freestyled the waistband and pockets.

The linen was from Oh Sew Crafty. Love the bright, fresh colour of this fabric. I'm planning on making another pair in a more muted shade. They're so comfy to wear around the house, just like PJs!


Tuesday, 28 April 2015

Summer skirt

I found this lovely viscose fabric online for just £2.99 per metre which was plenty to make this summer skirts. I overlocked the top edge to some 5cm waistband elastic then turned up the hem. Easy peasy :D


Scrap fabric bag

In an effort to use up lots of scrap bit of fabric (to make way fr new fabric of course) i decided to make a little tote bag for the summer. First i cut up loads of strips and cut the ends at 45 degree angles...


Then i assembled them together in rows using my overlocker


I secured the ends together and made a circle in the same manner for the base


I attached the base and then made a plain pink lining to fit inside


I made a couple of handles and sewed the top edge up in go, encasing the handles between the bag and lining fabric.